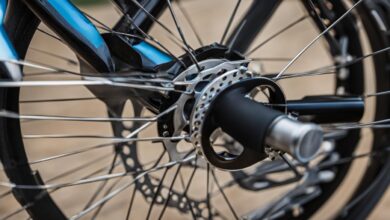
Disc brake rotors are an essential component of a mountain bike’s braking system. Over time, they can wear out and require replacement for optimal performance and safety. This guide will provide you with step-by-step instructions on how to replace your mountain bike brake rotor, ensuring that you can continue to ride with confidence.
Key Takeaways:
- Regularly check your brake pads and rotors for signs of wear and replace them if necessary.
- Gather the necessary tools before replacing your brake rotor to ensure a smooth replacement process.
- Check the thickness of your brake pads and the difference in thickness of your brake rotor to determine if replacement is needed.
- Follow the step-by-step instructions to replace your brake pads and rotor correctly.
- Bed-in your disc brakes after replacing the rotor to improve braking performance and reduce noise.
Signs of Worn Brake Pads and Rotors
Regularly checking your brake pads and rotors for wear is crucial to maintain your mountain bike’s braking performance and ensure your safety. Here are some common signs that indicate your brake pads and rotors are worn and in need of replacement:
- Decreased braking performance: If you notice that your brakes are not as responsive as they used to be, it could be a sign that your brake pads are worn out. Worn brake pads have reduced friction, resulting in less effective braking power.
- Unusual noises: Squealing, scraping, or grinding noises when you apply the brakes are often indicative of worn brake pads. These noises occur when the brake pad material has worn down significantly, and the metal backing plate comes into contact with the rotor.
- Worn-down appearance: Inspect your brake pads visually. If you notice that the brake pad material is visibly thinner or has worn down close to the metal backing plate, it’s a clear indication that your brake pads need replacement.
- Difference in thickness on the rotor: Brake rotors can also wear out over time. One sign of a worn rotor is a noticeable difference in thickness between the unused portion of the rotor and the area that’s been in contact with the brake pads. Measure the thickness at various points to check for any significant deviations.
- Ridge or step on the rotor surface: Run your finger or a paper clip along the surface of the rotor. If you feel any ridges or steps, it means that the rotor has developed uneven wear and needs to be replaced.
If you observe any of these signs, it is important to replace your brake pads and rotors promptly to maintain optimal braking performance and ensure your safety on the trails.
Necessary Tools for Brake Rotor Replacement
Before replacing your mountain bike brake rotor, it’s essential to have the right tools on hand. Here are the tools you’ll need for the job:
- Measuring tape: Used to measure the thickness of the brake rotor.
- T25 Torx wrench: Required for removing and installing the rotor bolts.
- 5 mm Allen wrench: Used to remove the wheel from the bike.
- Flathead screwdriver or disc brake pad spreader: Helps to push the brake pads away from the rotor, creating enough space to install the new rotor.
- Needle nose pliers: Useful for removing small clips or retaining pins that hold the brake pads in place.
- Cassette tool (for road bike rotors): Required if your bike uses a cassette-style rotor mounting system.
- Isopropyl alcohol: Used to clean the mounting surfaces of the rotor and hub to ensure proper adhesion.
- Degreaser: Helps to remove any grease or contaminants from the rotor and brake pad surfaces.
- Clean rag or lint-free cloth: Used to wipe down the rotor and make sure it’s clean before installation.
Having these tools readily available will make the process of changing your mountain bike brake rotor a breeze. Proper tools ensure a smooth replacement job and help to maintain the integrity of your bike’s braking system.
Checking Brake Pads for Wear
Regularly checking the wear on your mountain bike’s brake pads is crucial for maintaining optimal braking performance. To assess the condition of your brake pads, follow these simple steps:
- Remove the wheel from your bike.
- Inspect the caliper to see the amount of pad material remaining on the metal backing.
- If the pad material is less than 1mm thick, it’s time to replace the brake pads.
- Note that if your brake pads have become contaminated with brake fluids, oil, or grease, they should also be replaced.
Replacing worn brake pads will ensure that you have consistent and reliable braking power, giving you the confidence you need on the trails.
“Proper maintenance of brake pads is essential for safe and effective braking performance.”
Remember, always check your brake pads regularly and replace them as needed to maintain optimal performance on your mountain bike.
Checking Brake Rotors for Wear
Regularly assessing the condition of your mountain bike’s brake rotors is crucial for maintaining optimal braking performance. There are two primary methods you can use to determine if your brake rotors need replacement.
1. Measuring Thickness: Start by measuring the thickness of the unused part of the rotor. Then, compare it to the thickness of the used edge. If the difference is between 0.2mm and 0.5mm, it’s a clear indication that the rotor is worn and needs to be replaced. This measurement can be done using a standard digital caliper.
2. Visual Inspection: Another method is to visually inspect the surface of the rotor for any ridges or steps. You can run a paper clip or pick along the rotor’s surface to feel for any irregularities. If you encounter any bumps or noticeable imperfections, it’s a sign that the rotor has worn unevenly and should be replaced.
Remember, worn brake rotors not only compromise your braking power but also increase the risk of brake failure. By regularly checking your brake rotors for wear, you can ensure your mountain bike’s braking system is operating at its best.
Remember, regular inspection and timely replacement of your mountain bike brake rotors are essential for safe and effective braking performance. Keep an eye out for wear indicators such as thickness differences and surface irregularities. By promptly replacing worn brake rotors, you can maintain complete control and confidence during your rides.
Replacing Disc Brake Pads
When it comes to maintaining your mountain bike’s braking performance, replacing worn-out disc brake pads is crucial. Here’s a step-by-step guide on how to replace the pads and optimize your riding experience.
Step 1: Determine the Pad Type
Before proceeding with the replacement, identify the type of pads your caliper requires. Choosing pads that are compatible with your caliper and made from the same material as your original pads ensures optimal performance.
Step 2: Push the Pistons
Use a pad spreader or a flathead screwdriver to push the pistons back into the caliper. This step creates the necessary space for the new pads.
Step 3: Remove the Old Pads
Gently remove the old brake pads from the caliper. Take note of their position and orientation for proper installation of the new pads.
Step 4: Clean the Caliper
Using a degreaser and a clean rag or lint-free cloth, thoroughly clean the inside of the caliper to remove any dirt or contaminants. This ensures a clean and secure fit for the new pads.
Step 5: Install the New Pads
Place the new brake pads into the caliper, aligning them correctly according to the previously noted position and orientation. Be cautious not to touch the braking surface of the pads with your fingers, as this may introduce oils and contaminants that can compromise braking performance.
Step 6: Secure the Pads
Once the new pads are in place, use the provided bolt or pin to secure them in the caliper. Follow the manufacturer’s instructions for tightening and torque specifications to ensure proper installation.
With the new brake pads securely in place, your mountain bike will be ready to deliver reliable stopping power on your next ride. Remember to bed-in the pads and rotors before aggressive riding to optimize their performance.
Replacing Disc Brake Rotors
When it comes to maintaining your mountain bike’s braking system, replacing the disc brake rotors is an important task. To ensure a smooth and safe ride, follow these steps to replace your mountain bike’s disc brake rotor.
Before you begin, make sure you have the correct replacement rotor and the necessary tools. There are two main types of rotors: 6-bolt and center-lock. Choose the rotor that is compatible with your bike’s brake system.
Start by removing the old rotor using the appropriate tool. This may require a rotor lockring removal tool or a cassette lockring tool, depending on the type of rotor on your bike. Carefully loosen and remove the old rotor, taking note of its position.
While the old rotor is removed, take the opportunity to clean the hub. Use a cloth or brush to remove any dirt, debris, or residue from the hub surface. This will help ensure a smooth installation of the new rotor.
Now, it’s time to install the new rotor. Begin by aligning the new rotor with the rotor mounting points on the hub. Make sure the rotor is positioned correctly, with the bolt holes or splined interface aligned with the corresponding mount on the hub.
Tighten the bolts or lockring to secure the rotor in place. It’s important to tighten the bolts evenly and to the manufacturer’s specifications to ensure proper rotor alignment and stability.
Before replacing the wheel, use isopropyl alcohol to clean the new rotor. This will remove any contaminants that may affect the braking performance.
Once the new rotor is clean and properly installed, you can now replace the wheel. Make sure the wheel is securely attached, with all quick-release or thru-axle mechanisms properly tightened.
With the new disc brake rotor in place, take a moment to appreciate the improvement in your mountain bike’s braking performance. You can now enjoy smoother and more efficient braking on your rides.
Remember to regularly inspect and maintain your disc brake rotors to ensure optimal performance. If you notice any signs of wear or damage, it’s important to replace the rotor promptly to maintain your safety on the trails.
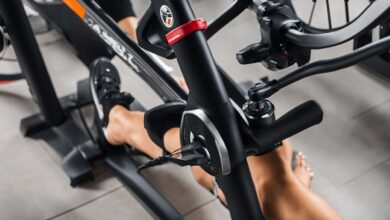
How to Bed-In Disc Brakes
Before your first ride with the new brake rotor, it is important to bed-in the disc brakes. This process helps to deposit an even layer of pad material onto the rotor, improving braking performance and reducing noise.
To bed-in your disc brakes, follow these steps:
- Find a safe area to ride and accelerate to a moderate speed.
- Apply both brakes firmly and evenly, but do not come to a complete stop.
- Repeat this process 15-30 times until you feel the brakes biting with more power.
- Let the brakes cool down before your first ride.
Bedding-in your disc brakes properly will ensure optimal braking performance and a longer lifespan for your new brake rotor.
“Bedding-in your disc brakes properly will ensure optimal braking performance and a longer lifespan for your new brake rotor.”
Different Types of Disc Brake Rotors
When it comes to disc brake rotors for mountain bikes, there is no one-size-fits-all solution. These essential components come in a variety of sizes and designs to cater to different riding disciplines and terrain. Understanding the different types available can help you make an informed decision when it comes to mountain bike rotor replacement, brake rotor change, or brake rotor upgrade.
Size Matters: Impact on Braking Performance
The size of the rotor plays a crucial role in braking performance. Road and gravel bikes typically use smaller rotors in the range of 140-160mm, as they require less stopping power due to their lighter weight and lower speeds. On the other hand, mountain bikes often use larger rotors, typically ranging from 180mm to 220mm, to provide the necessary braking force for tackling challenging off-road trails and descents.
Construction Techniques: Performance and Weight Considerations
In addition to size, disc brake rotors also employ different construction techniques that can impact performance and weight. Two popular variants include heat-dissipating rotors and floating rotors.
Heat-dissipating rotors: These rotors are designed to dissipate heat more efficiently, allowing for improved consistency in braking performance. They often feature cutouts or vented designs that help in dissipating heat and preventing brake fade during prolonged descents or intense braking.
Floating rotors: Floating rotors consist of an outer braking ring and a separate inner carrier connected by a series of rivets. This design allows for slight sideways movement, helping to reduce the likelihood of warping or distortion, resulting in smoother and more consistent braking.
Both heat-dissipating and floating rotors offer advantages in specific riding conditions and disciplines, providing riders with options that align with their preferences and requirements.
Understanding the different types of disc brake rotors available for your mountain bike can help you make an informed decision when it comes to replacement, change, or upgrade. Consider factors such as the riding discipline, terrain, and your braking performance needs to select the right rotor for your specific setup.

Conclusion
Proper maintenance and replacement of your mountain bike brake rotor is essential for safe and effective braking. By regularly checking for wear, using the correct tools, and following the steps outlined in this guide, you can easily replace your brake rotor and ensure optimal performance on your rides.
Remember to always follow the manufacturer’s recommendations and bed-in your brakes before riding. With a well-maintained brake rotor, you can confidently conquer any trail.
Don’t let worn-out brake rotors hamper your mountain biking experience. Take the time to inspect and replace your brake rotor when necessary, ensuring reliable stopping power and control. With the knowledge gained from this guide, you can confidently tackle any repairs and replacements needed in the future.
So, don’t wait until you experience decreased braking performance or strange noises. Take proactive steps to maintain your mountain bike’s brake system by replacing the brake rotor when necessary. Your safety and enjoyment on each ride depend on it!
FAQ
What are the signs of worn brake pads and rotors?
Signs of worn brake pads include decreased braking performance, unusual noises, and a worn-down appearance. Worn brake rotors may have a difference in thickness between the unused portion and the used edge, or they may have a ridge or step on the surface.
What tools do I need for brake rotor replacement?
You will need a measuring tape, T25 Torx wrench, 5 mm Allen wrench, flathead screwdriver or disc brake pad spreader, needle nose pliers, cassette tool (for road bike rotors), isopropyl alcohol, degreaser, and a clean rag or lint-free cloth.
How do I check brake pads for wear?
To check the wear on your brake pads, remove the wheel from your bike. Look into the caliper to see how much pad material remains on the metal backing. If there is less than 1mm of pad material, it is time to replace the pads.
How do I check brake rotors for wear?
Measure the thickness of the unused part of the rotor and compare it to the thickness of the used edge. If the difference is between 0.2mm and 0.5mm, it is time to replace the rotor. Additionally, you can run a paper clip or pick along the surface of the rotor to feel for any ridges or steps.
How do I replace disc brake pads?
Choose pads that are compatible with your caliper and made from the same material as your original pads. Use a pad spreader or flathead screwdriver to push the pistons back into the caliper. Remove the old pads and clean the inside of the caliper with degreaser. Place the new pads in the caliper and secure them with the provided bolt or pin.
How do I replace disc brake rotors?
Remove the old rotor using the appropriate tool. Clean the hub while the rotor is removed. Install the new rotor, ensuring that it is properly aligned and tightened according to the manufacturer’s specifications. Use isopropyl alcohol to remove any contamination from the new rotor before replacing the wheel.
How do I bed-in disc brakes?
Find a safe area to ride and accelerate to a moderate speed. Apply both brakes firmly and evenly, but do not come to a complete stop. Repeat this process 15-30 times until you feel the brakes biting with more power. Let the brakes cool down before your first ride.
What are the different types of disc brake rotors?
Disc brake rotors come in a variety of sizes and designs to suit different riding disciplines and terrain. The size of the rotor will impact braking performance. Road and gravel bikes typically use smaller rotors (140-160mm), while mountain bikes often use larger rotors (180-220mm). There are also different construction techniques, such as heat-dissipating designs and floating rotors, which can improve performance and reduce weight.